Sunday, February 12, 2012

Pretty things to make up for my absence.

I will probably post several times today to make up for the fact I haven't posted ALL WEEK.
I am eternally sorry.

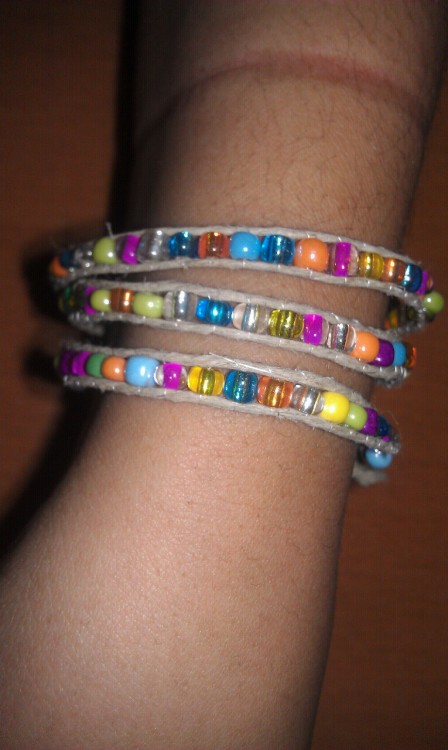
Anyways, to make up for it, here is the bracelet I made this week (well, I made a few, but they got away!)

It was my take on this bracelet:


I'm not into going out and buying supplies if I have stuff around the house that would work. So I improvised.
(I will admit that I did go out and by beads for making more of these after I had finished a couple)

What they called for:
Leather Cord (Larger)
Leather Cord (Smaller)
Beads
Button

What I used instead:
Hemp Cord
Nylon Invisible Thread
Beads
Button


So really, you could use anything you have lying around the house.

Ready? OK. Here we go:
(On a scale of 1 to monkey easy, a caveman could do it)
Time: 15 Minutes

1) Cut a piece of cord twice as long as you want the bracelet to be (mine wraps twice around my wrist, so I quadrupled my wrist size) then add a few inches.

2) Fold in half and tie a knot, making a loop just big enough for your button of choice to pass through.

3) Secure it to your workspace.


In my case, that means "Scotch Tape it to the coffee table"

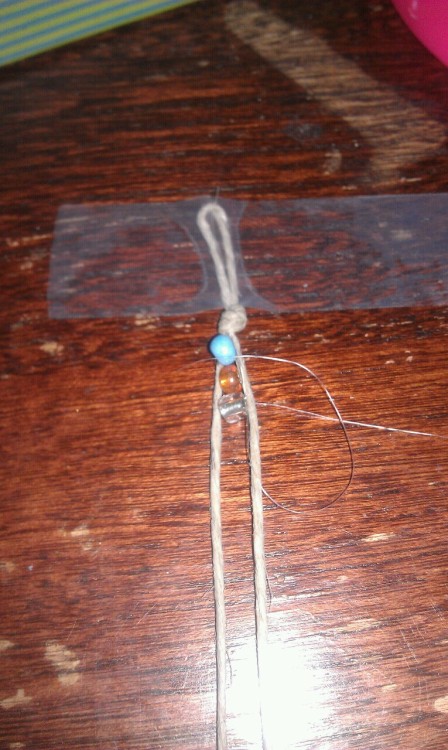
4) Cut a long length of the thread/cord you will be using. Tie one end to the very top of the strings, as close to the knot as you can.

5)Now, I used a needle; you don't have to. But this thread really is "Invisible" so it helped a lot. Anyways, put a bead on your needle/cord.


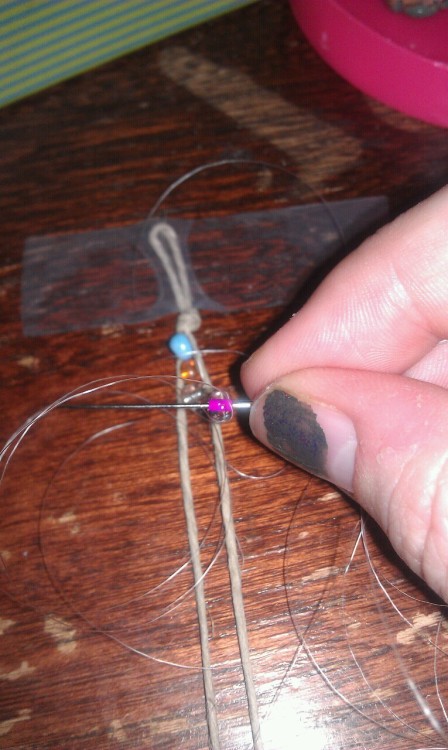
6) This is the basic principle of the entire bracelet: Figure 8. You are going to be making a bunch of figure 8s with the thread to hold the beads in place. So going to the left, you bring the needle under the left string...

and going to the right the needle goes under the right string.
img src="http://28.media.tumblr.com/tumblr_lza5geGB8G1qimlc1o1_500.jpg"/>

This locks the bead in place between the two strings.

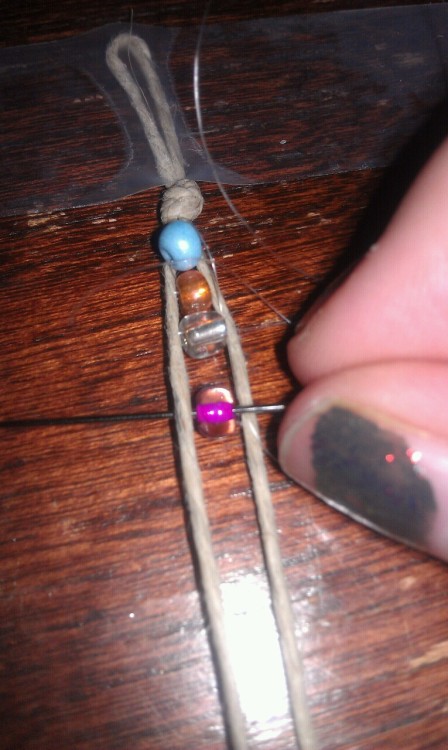
7) This isn't really a step, just keep doing step 6 over and over and over until you either:
a) have a bracelet
b) get bored
c) go mad

Here is my wonderful friend Shani modeling the finished product for you folks!

thank

Saturday, February 4, 2012

I planned on Saturday being my Long Term Project post

So, if you read the title (and I'm assuming you did because it's bigger than these words),you will notice my use of the word "planned."

Things in my life never really go according to that way.

So I made something else to show you!!!!
YAY!

I also made it a bit of an instructional.

Cool, so what do you need?

1 brown paper shopping bag
A container of foam shapes
Scissors
Pencil

"okay...what the hell am i making with this?"

oh, right.

My Valentine's Day Wreath OF COURSE!!!!

okay, anyways, heres whatcha do:

find a paper shopping bag about the size of the wreath you want


american eagle bag

open it up by cutting down the side
draw a line down the center of the bag in the middle of one of the handles
draw one side of a heart (so the mirror image makes the heart symmetrical) fold on the line, and cut out the shape of the heart

cut out bag

Be careful not to cut the bag handle out! You'll need that fot hang it with.

Here's a better shot of what I drew on the bag, so you can see what I'm talking about.

drawing of heart on bag

There you can see another line I drew.

In order to have a wreath, I'm about 80% sure it needs a hole.
So make one.

now its a wreath

Dump out the package of foam stickers while excitedly whispering "Make it rain bitches!" just loud enough for your boyfriend on the couch to stare quizzically at you.

make it rain foamy stickers shaped like hearts!

Then spend about 45 minutes obsessively organizing all the foam stickers like a freaking loon. That's just how I roll.

I probably need professional help. meh.

after you're done OCD style spazzing out about foam, decorate your wreath and hang it up somewhere the light of day will never touch it.

The

Friday, February 3, 2012

My heart is squishy and made of yarn

true story bro.

Okay, well these aren't MY hearts, my friend Gabrielle made them.
But they are pretty damn awesome, so I'm putting them up here anyways.

heart garland

here are some better pictures so you can see the stitching that went into them.

red heart

pink heart

this one is my favorite because its a little bit derpy

derpy heart

anyways, theres PLENTY of time before Valentine's Day, so here's the pattern if you would like to make some. I got this from Gabs, so if you know where its from and can give me the source I would appreciate it, I'd like to give credit where its due.

Super easy pattern for beginners:
Can be done with any size needle/weight yarn you want.
(but obviously, proportion is necessary)

CO 2 st
row 1: kfb, k to last st, kfb
row 2: p 1 row
rep these 2 rows 6 times total (14 st)

row 3: k2 tog, k5 and turn, leaving remaining 7 st on the needle
row 4: p2tog, p2, p2tog
BO 4 st, cut a long piece of yarn (about 10″) and weave through back of piece to reattach to other side (where you left off when turning)
row 5: k5, k2tog
row 6: p2tog, p2, p2tog
BO 4 st

Get working!

Wednesday, February 1, 2012

The girl is crafty like ice is cold!

Hi!
My name is Mary, I more commonly go by Lysha.
and I like to make things.
So, despite my hatred of all things by the Beastie Boys, I find it a fitting title.

Along with things I make, I plan on featuring different websites and other projects that I see on the web.

Want to make something you saw in a magazine for cheap? I bet I can find a way to recreate it, or find someone who already has.

-LCG